Kartra is a powerful and popular growing marketing automation platform which has some cool all-in-one features. It’s built in analytics are great for quickly and easily tracking your email conversion rates and up-sell conversions.
However, it currently lacks an easy way to add the Google Analytics tracking code, (or any 3rd party tracking code for that matter).
Many digital marketers consider it necessary to be able to track their sites with Google Analytics and Facebook Pixels because that is how we are able to measure the success of our marketing campaigns.
If we are running paid ads on Facebook, we want to be able to fire a conversion event when someone opts into our Kartra lead list.
Or if someone subscribes to our Kartra membership site, we want to be able to track the transaction and revenue inside Google Analytics Ecommerce module.
The best way to be able to fire and track any pixel across our Kartra Pages is to use the free and powerful tag manager provide by Google.
So let’s start by installing Google Tag Manager inside our Kartra account!
Google Tag Manager in Kartra
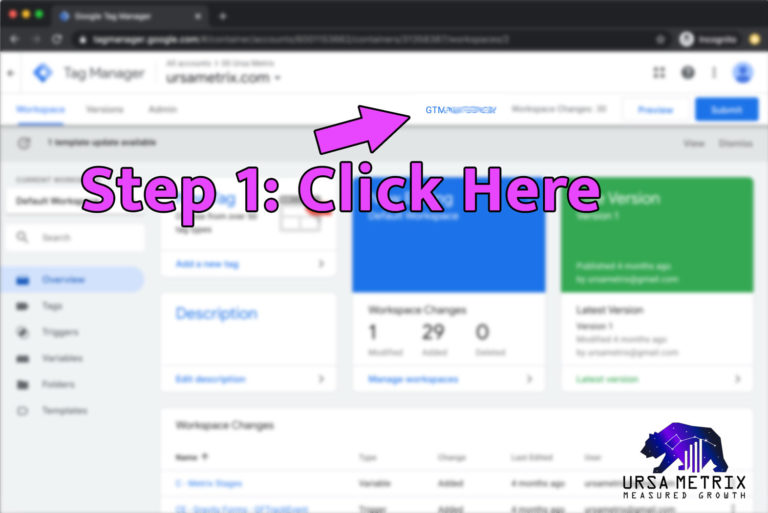
Get GTM Container ID
The first step to adding Google Tag Manager to Kartra is to get your GTM code snippet.
Log into your Google Tag Manager account, and click on your GTM container ID.
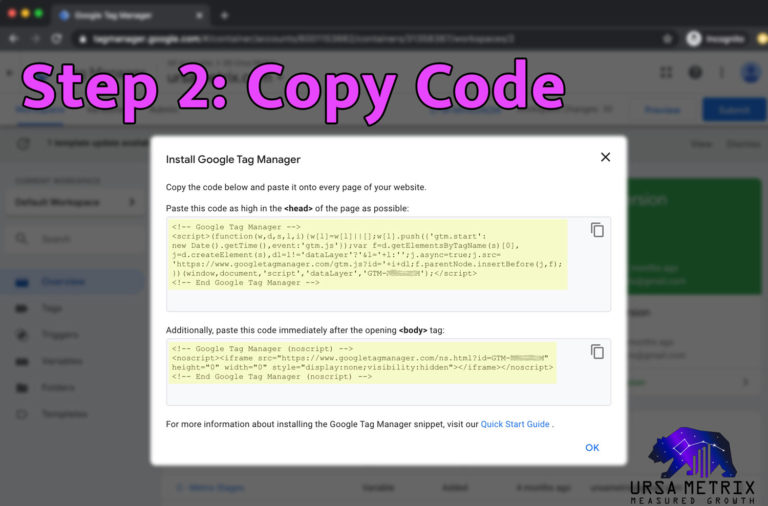
Copy GTM Code Snippet
Highlight the code shown inside your Google Tag Manager account, and press Ctrl+C to copy the code. Or you can press the “copy” icon to the right hand side of the code snippet to have it be copied to your clipboard.
Paste the code into a text file to have it readily available. Be sure to copy & paste both sections of the code.
The code will look like this:
<!– Google Tag Manager –>
<script>(function(w,d,s,l,i){w[l]=w[l]||[];w[l].push({‘gtm.start’:
new Date().getTime(),event:’gtm.js’});var f=d.getElementsByTagName(s)[0],
j=d.createElement(s),dl=l!=’dataLayer’?’&l=’+l:”;j.async=true;j.src=
‘https://www.googletagmanager.com/gtm.js?id=’+i+dl;f.parentNode.insertBefore(j,f);
})(window,document,’script’,’dataLayer’,’GTM-XXXXXXX’);</script>
<!– End Google Tag Manager –>
<!– Google Tag Manager (noscript) –>
<noscript><iframe src=”https://www.googletagmanager.com/ns.html?id=GTM-XXXXXXX”
height=”0″ width=”0″ style=”display:none;visibility:hidden”></iframe></noscript>
<!– End Google Tag Manager (noscript) –>

Go To Kartra Pages
Log into your Kartra account and go to the “My Pages” section.
Then find the page that you want to add your Google Tag Manager code to and click on the 3 Dots … and click “Edit”.
An “Edit Page” window will pop up, and you will need to click the “Edit” button in the upper right hand corner to bring up the page builder inside Kartra.
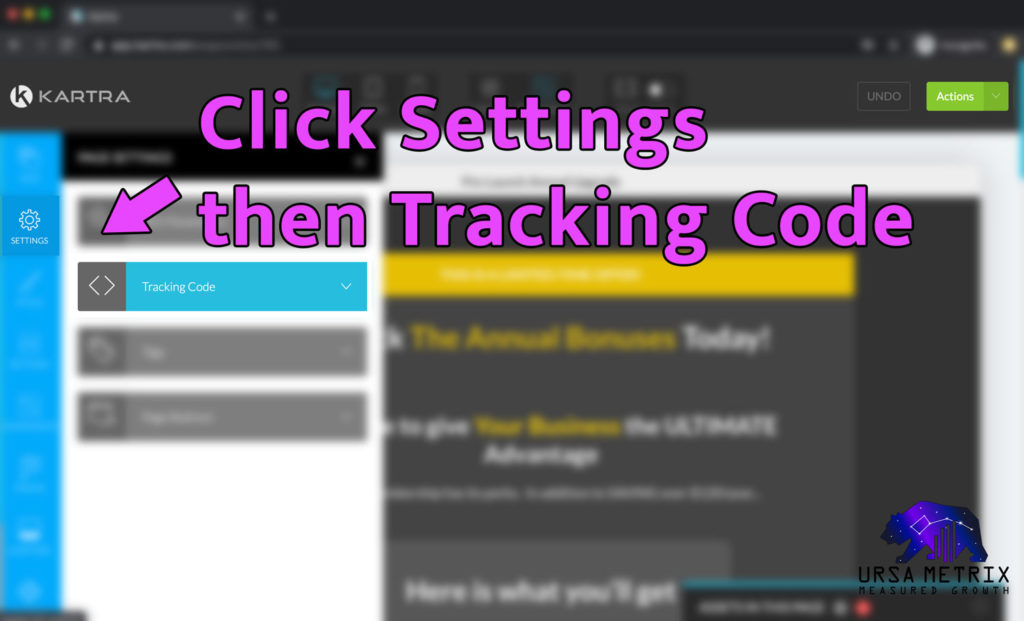
Edit Page In Kartra Page Builder
Inside the Kartra Page Builder, click on the “Settings” Gear icon on the left hand side menu.
Then click on the “Tracking Code” section

Paste GTM Tracking Code Into Kartra
Paste your GTM Tracking Code into the Kartra tracking code sections.
Be sure to REMOVE the <script> and </script> from the HEAD code snippet.
You will need to edit the code snippet that goes into the <head> section, and remove the <script> tags, this is because Kartra is already wrapping the code inside <script> tags inside the head section of the page. If you do not remove these tags, the code will break.
You can paste the <body> code snippet as-is.
Don’t forget to click the green “Actions” button in the upper right hand corner of the Kartra Page Builder and click “Save Progress” and then “Publish Live” to push your Google Tag Manager code live on your page.
Add Google Tag Manager To Every Kartra Page
Now that you know how to add your GTM container code to a single page, now it’s time to push the tracking codes live to every page in your Kartra Site.
There are two ways to do this, the first is to edit every single page like you just did, and copy/paste the Google Tag Manager snippet into the Tracking Code section for the Kartra Page.
OR you can use the Global Elements feature to import/export settings for your site, which includes the Tracking Code.
The Global Elements method is useful when managing many pages on your Kartra Site, but it does still require manually importing the global settings to every page.
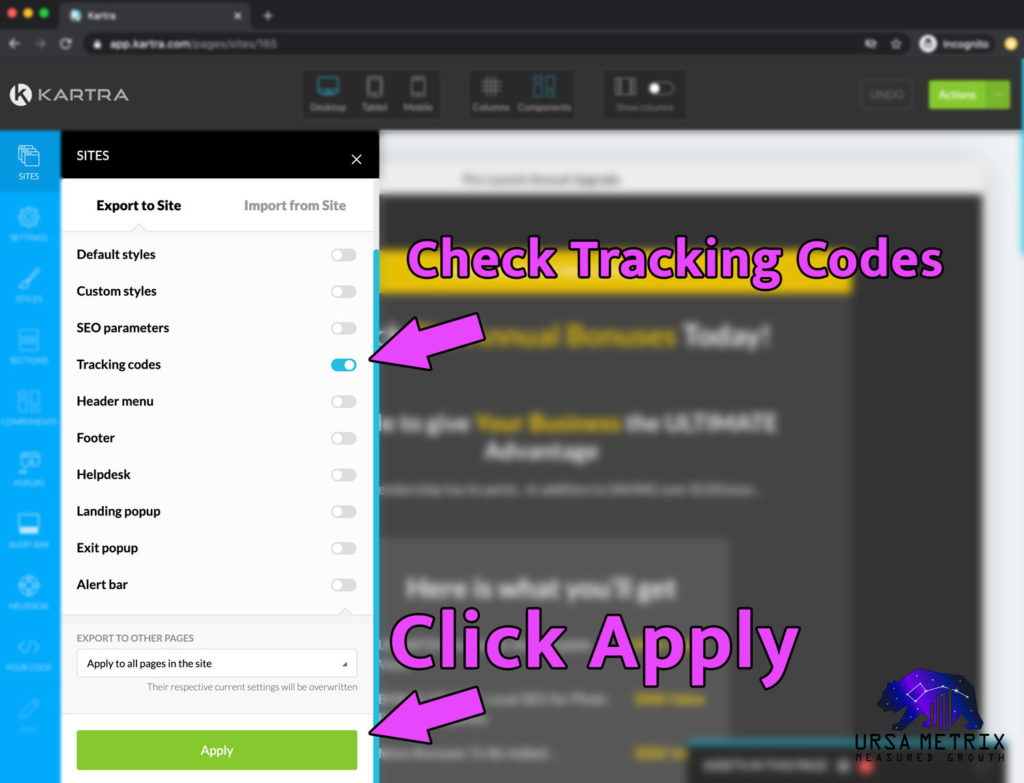
Paste GTM Tracking Code Into Kartra
In the Kartra Page Builder for the page you just edited with your Google Tag Manager tracking snippet, click on the “Sites” icon in the left-hand menu.
Then under the “Export to Site” section, check the “Tracking Codes“
And then click the green “Apply” button at the bottom.
Congratulations! Your GTM Tracking snippet is part of the Global Elements Tracking Codes for your Kartra Pages.
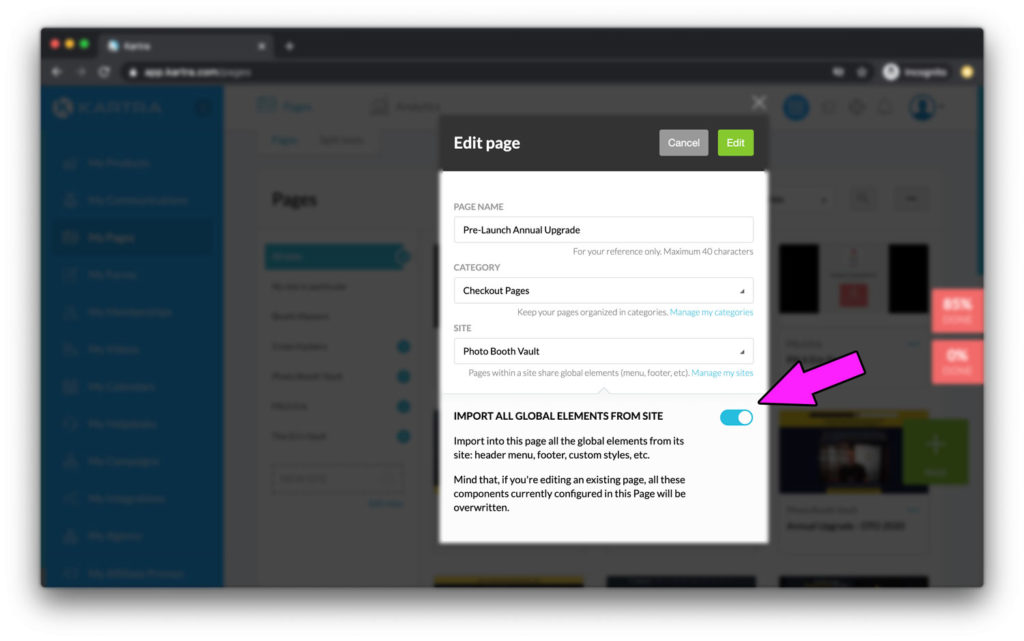
Import All Global Elements From Site
Now that your GTM snippet is saved as a Global Element for your Kartra Site, you will need to edit all of your other pre-existing pages.
When you click the 3 dots … and then click “Edit Page”, the edit page window that pops up has an option at the bottom to “IMPORT ALL GLOBAL ELEMENTS FROM SITE“.
If you check this option and then click “Edit”, all of the global elements, including your GTM tracking code will be imported.
However, if you have other elements in your site such as CSS, custom styles, helpdesk, or footer etc that you DO NOT want to be overwritten, then you will have to manually import just the Tracking Codes from the Global Elements.
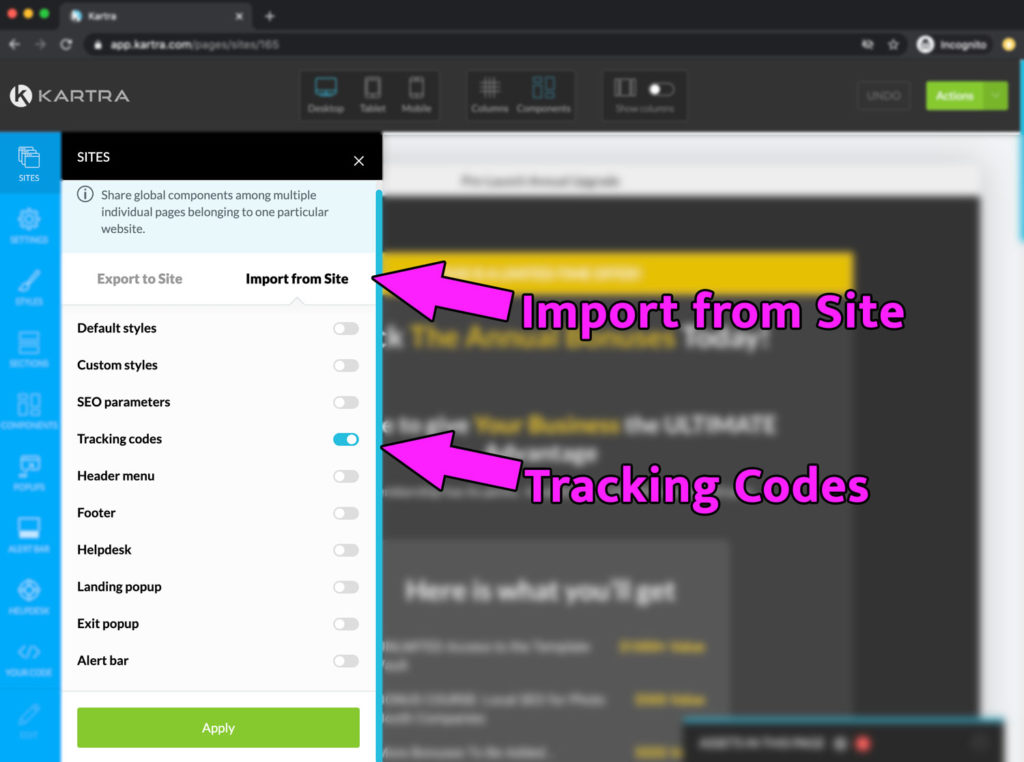
Import Just The Tracking Codes From Site
Go into the Kartra Page Builder for the page you want to add your GTM codes to
Click on the “Sites” icon in the left-hand menu.
Go to the “Import from Site” tab.
Check the “Tracking Codes” option.
Click the green “Apply” button.
Ta Da! You have now imported the tracking codes saved in the Global Elements for your Kartra Site to the page.
Now you can go through every page in your Kartra account and import your GTM container code into each page.
Add Google Analytics To Your Kartra Pages
Now that you have your Google Tag Manager container code live on every Kartra Page, now it is time to add your Google Analytics code to the GTM container.
Add Facebook Pixel To Your Kartra Pages
Adding your Facebook tracking pixel to your Kartra pages is easy now that your GTM container is live. You can manually add the tracking pixel, or use the Facebook Pixel template by Simo Ahava.


